Matt’s Violin
My local makespace got a 3d printer, and I thought it would be a lot of fun to trying building a violin. I play a little bit of violin but I’m no master and I’m certainly no luthier, with that in mind these are some of my experiences in the process.
Version 1.0
The 3d printer was an Ultimaker 3 Extended which has dual-extruders so you can print with water-soluble support material (PVA). I had read about the Hovaline but I felt attached to the traditional shape of a violin with its scroll and multiple colors. I found a blog post from Formlabs detailing a violin they designed and built. I decided to move forward with that design. So I started printing.
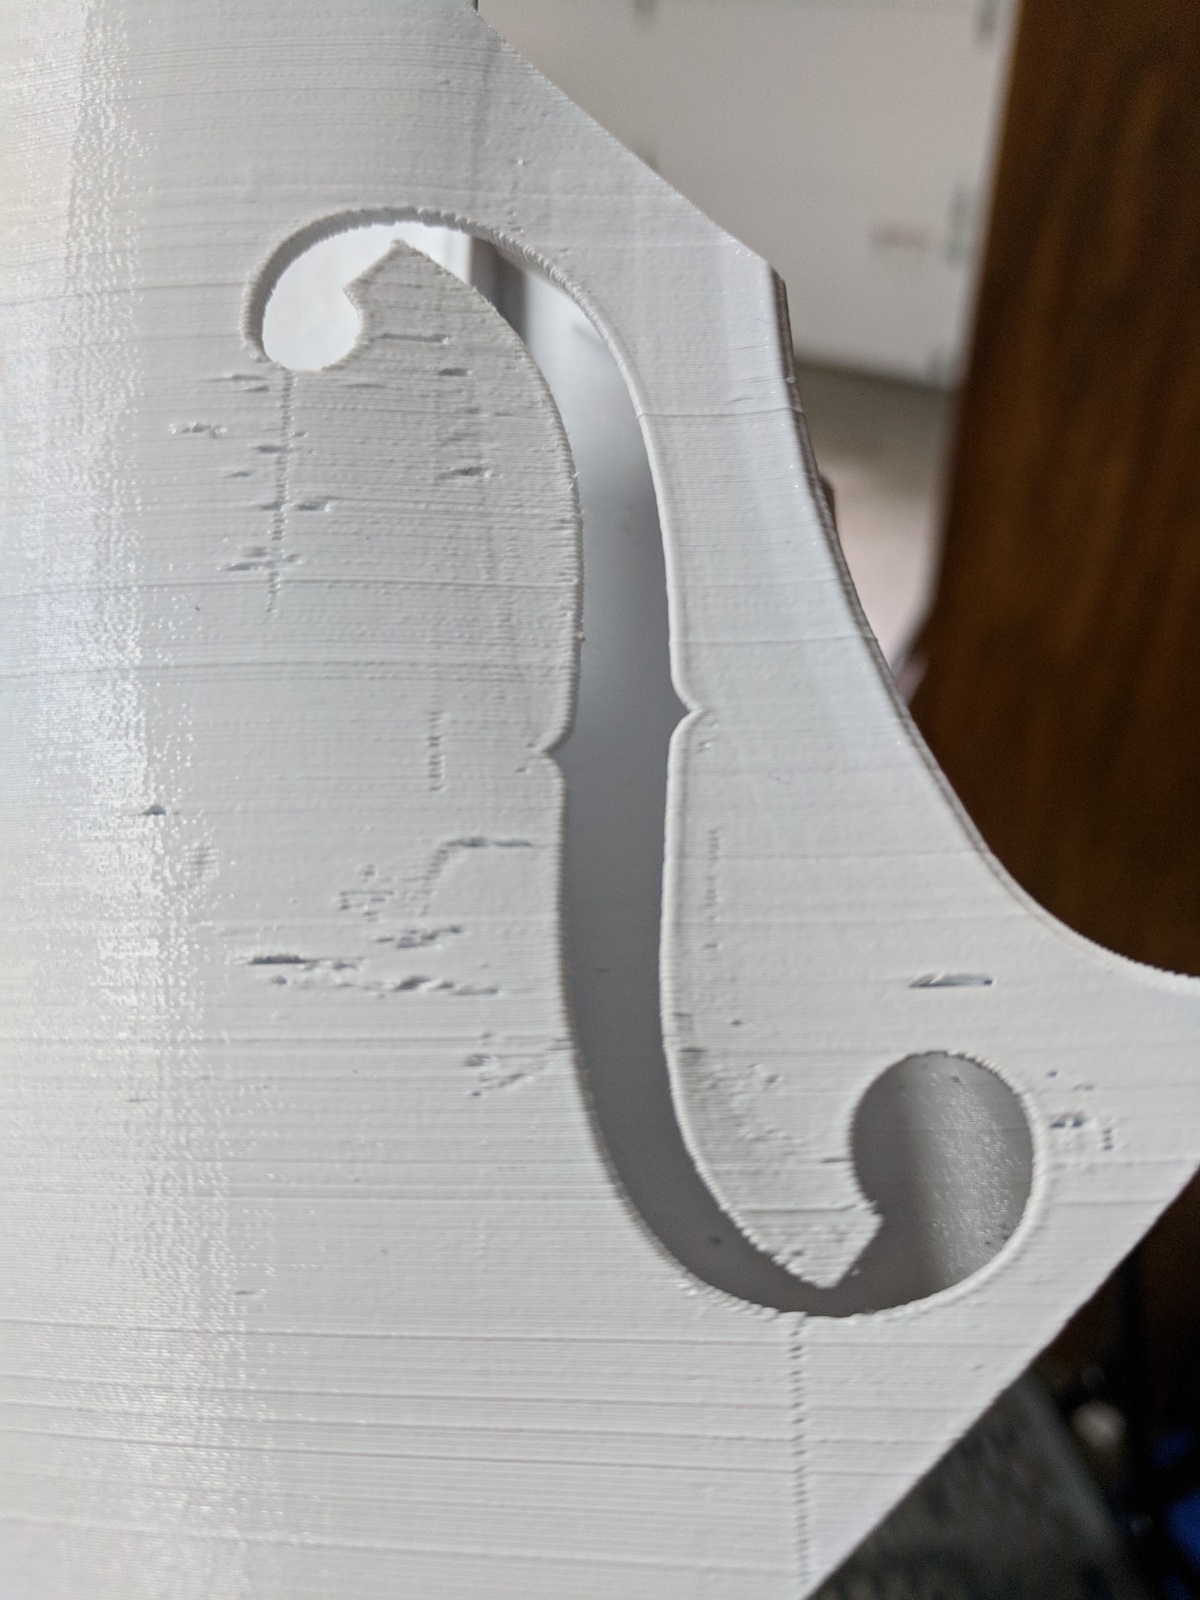
This part took about five days to print plus two more to dissolve the support material. It is heavily striated and there are holes where a stream of PVA crossed the path where I wanted my violin to be.
I had much more success printing my parts laying down instead of standing up. The striations almost look like a wood grain in that orientation and I didn’t have any more issues with PVA leaving holes in the finished part. I needed about four more five-day prints to make the main body and all the little bits. The design calls for inserting carbon-fiber rods for structural support and the parts have perfectly-sized slots for those rods. At least the slots are prefectly-sized if you have a perfect 3d printer. I also found out on these parts that dissolving PVA seems to warp the PLA plastic of the part.

The carbon fiber won’t fit, and the plastic is warping, maybe I can sand down the carbon fiber and fill in the gaps with epoxy? Around this time my local makerspace aquired a Formlabs Form 2. This is the printer my violin was designed to be built on so I abandoned my first attempt but glued together the parts to create a pretty violin-shaped-object. I’ll probably donate this back to the shop for them to hang on the wall as decoration or something.
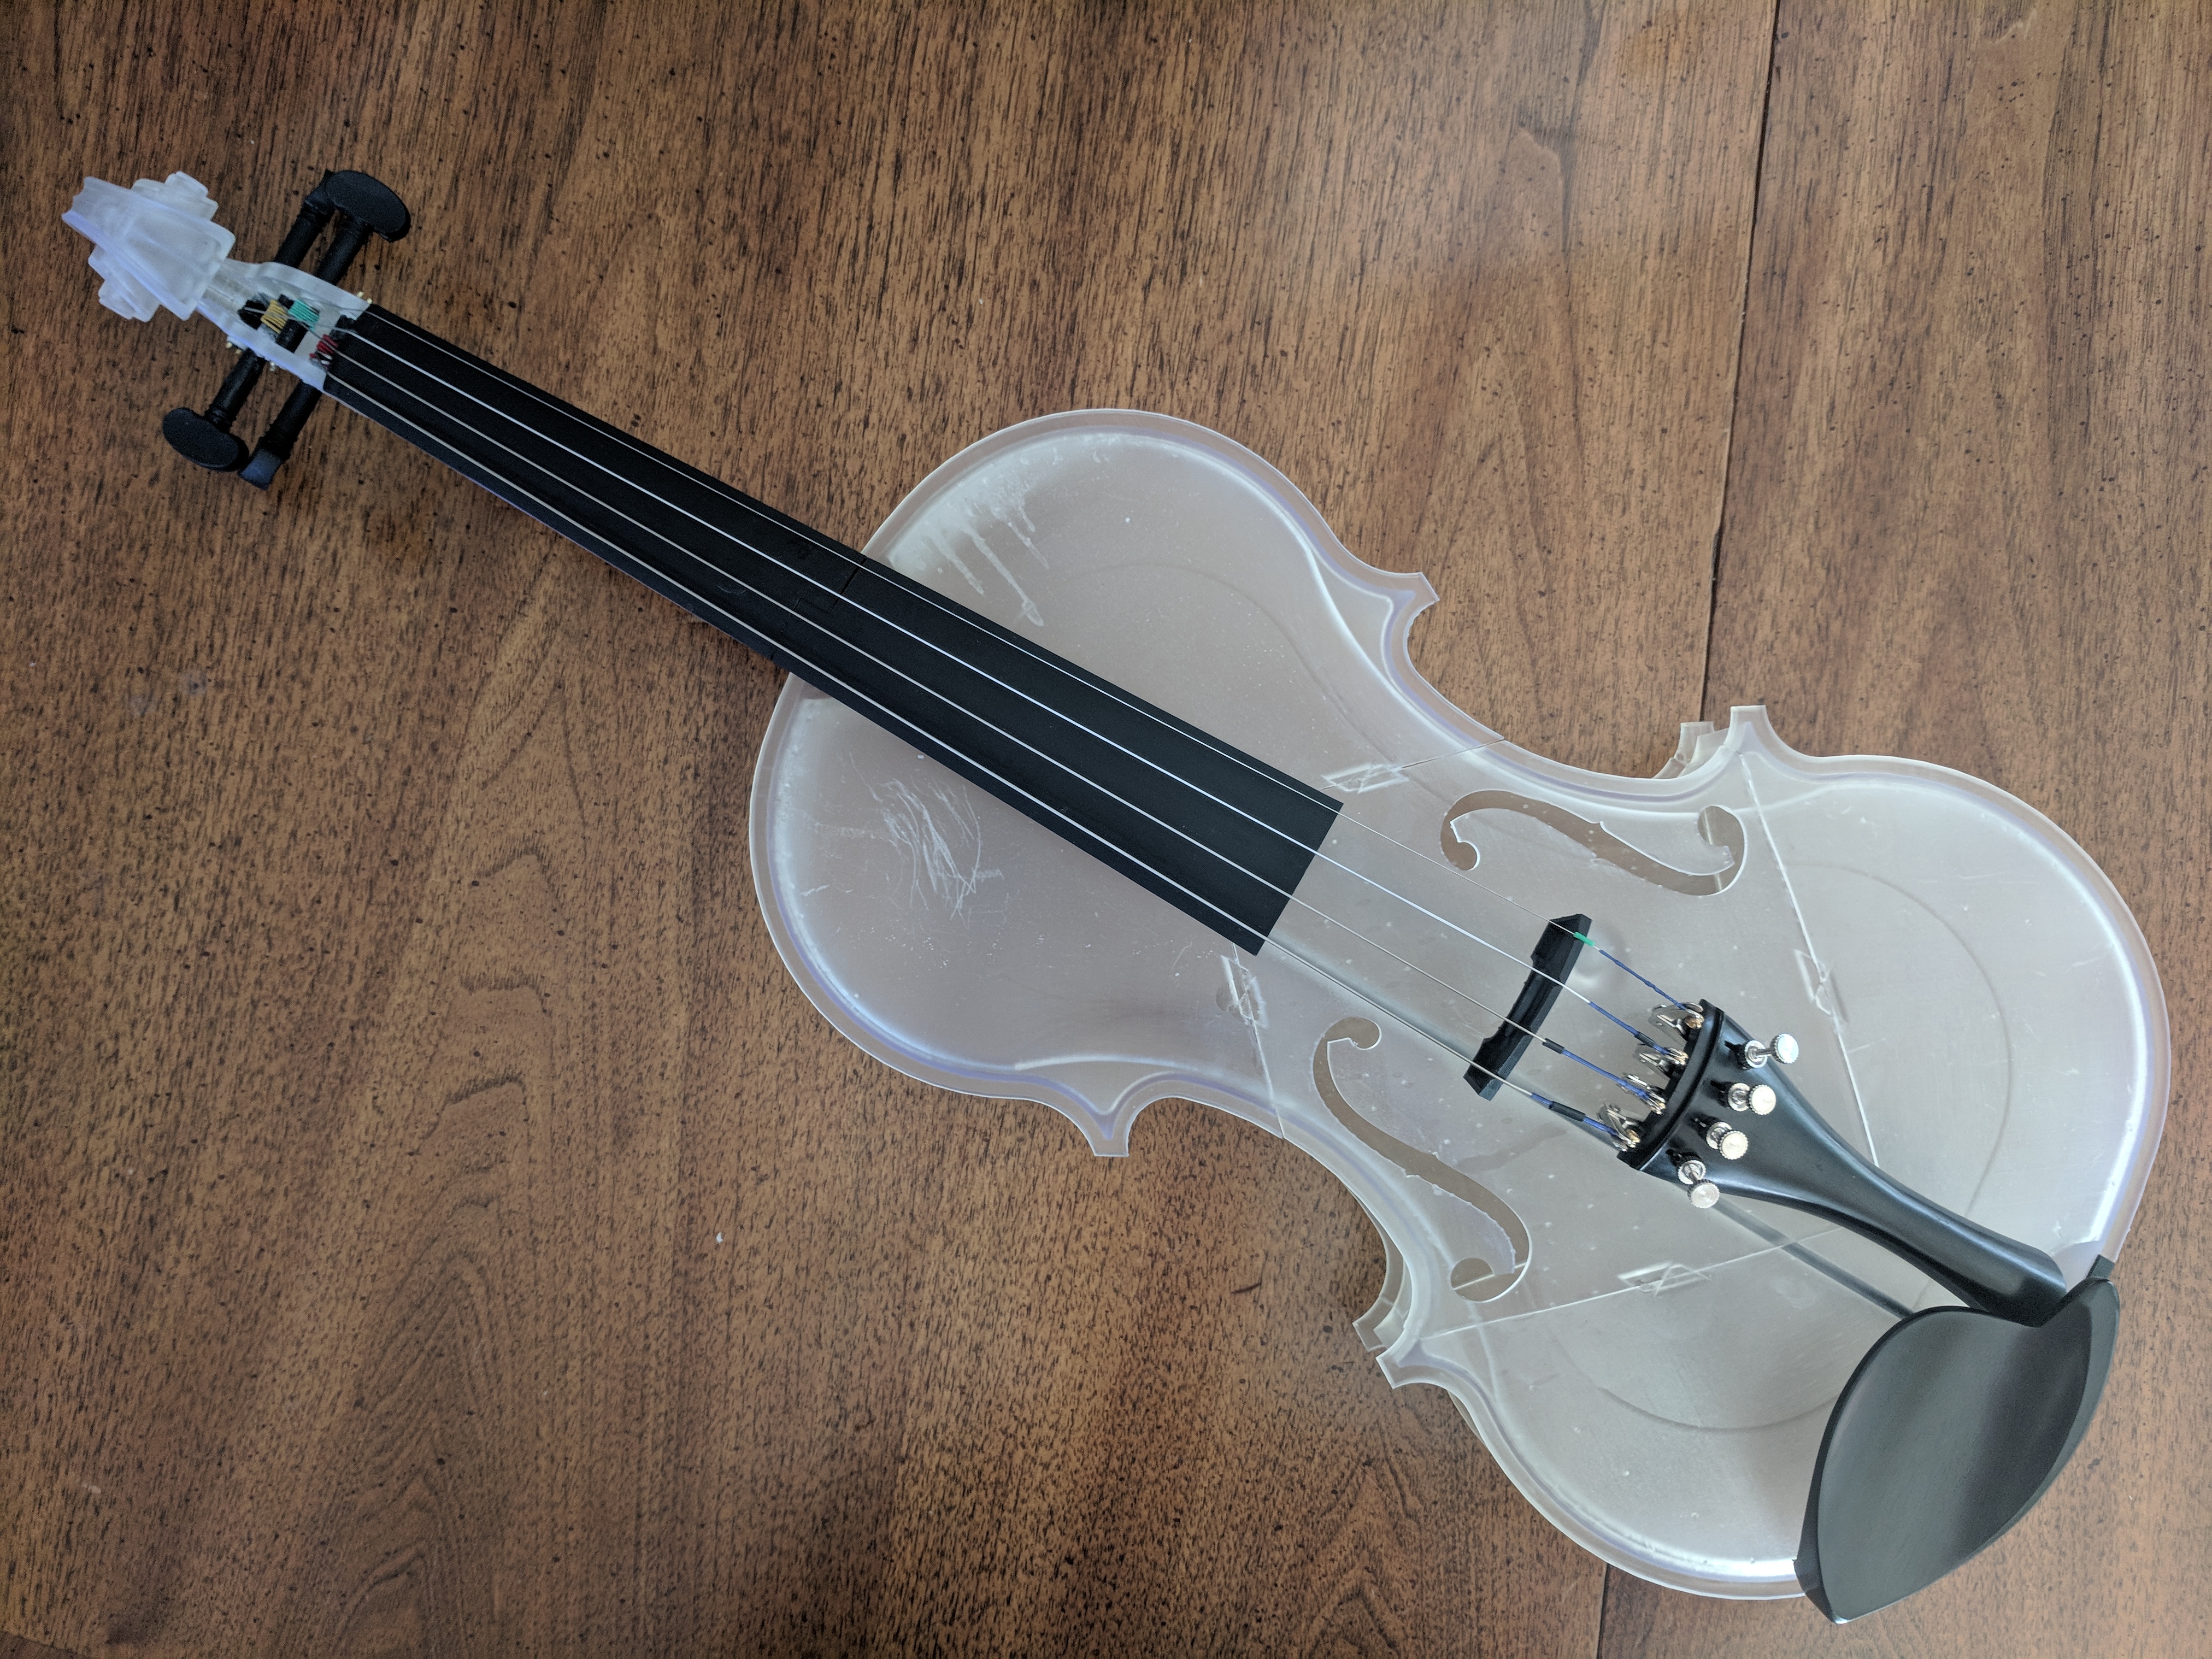
Version 2.0
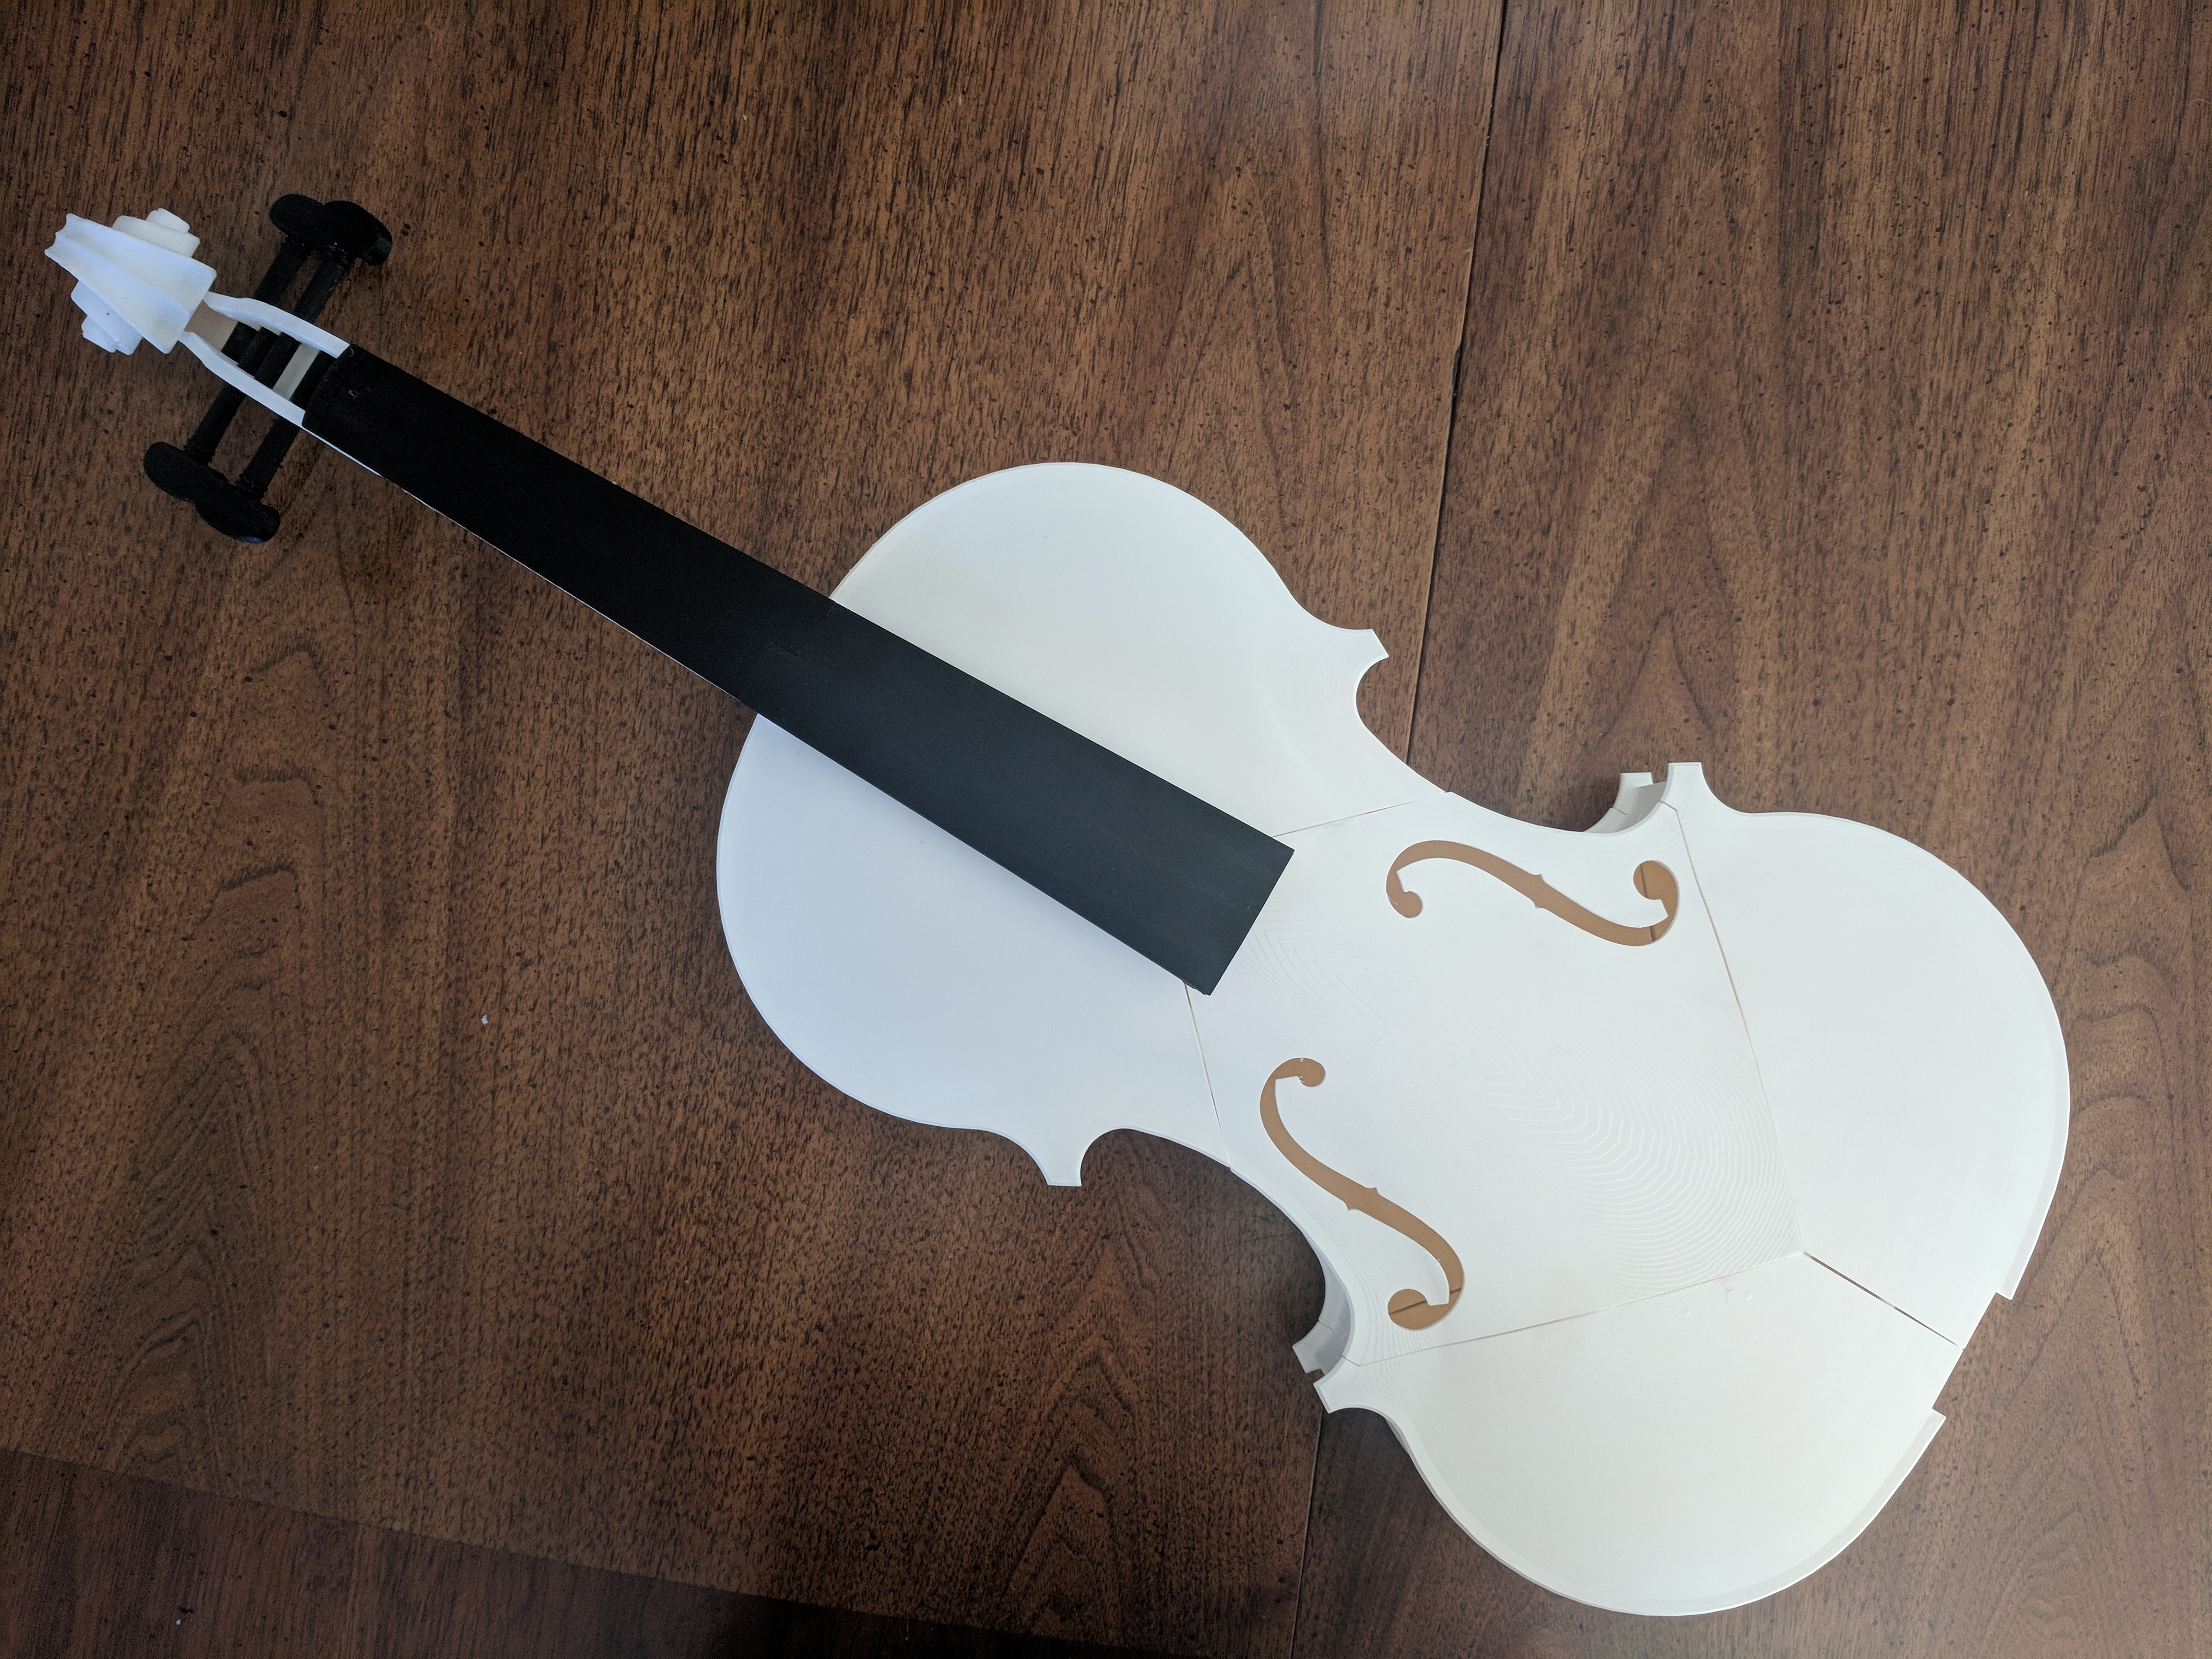
Printing on the Form 2 creates some very pretty results. Even at the lowest resolution the prints are smooth, and at that resolution what took a month with the Ultimaker took a week with the Form 2. Unfortunately the resin-based printing doesn’t offer any sort of water-soluble support. We need to print with physical supports that we clean up as part of post-processing the parts. The shop only had clear and black resin, so I started printing my body in clear. The supports are very difficult to clean out of the inside so they leave some visual imperfections.
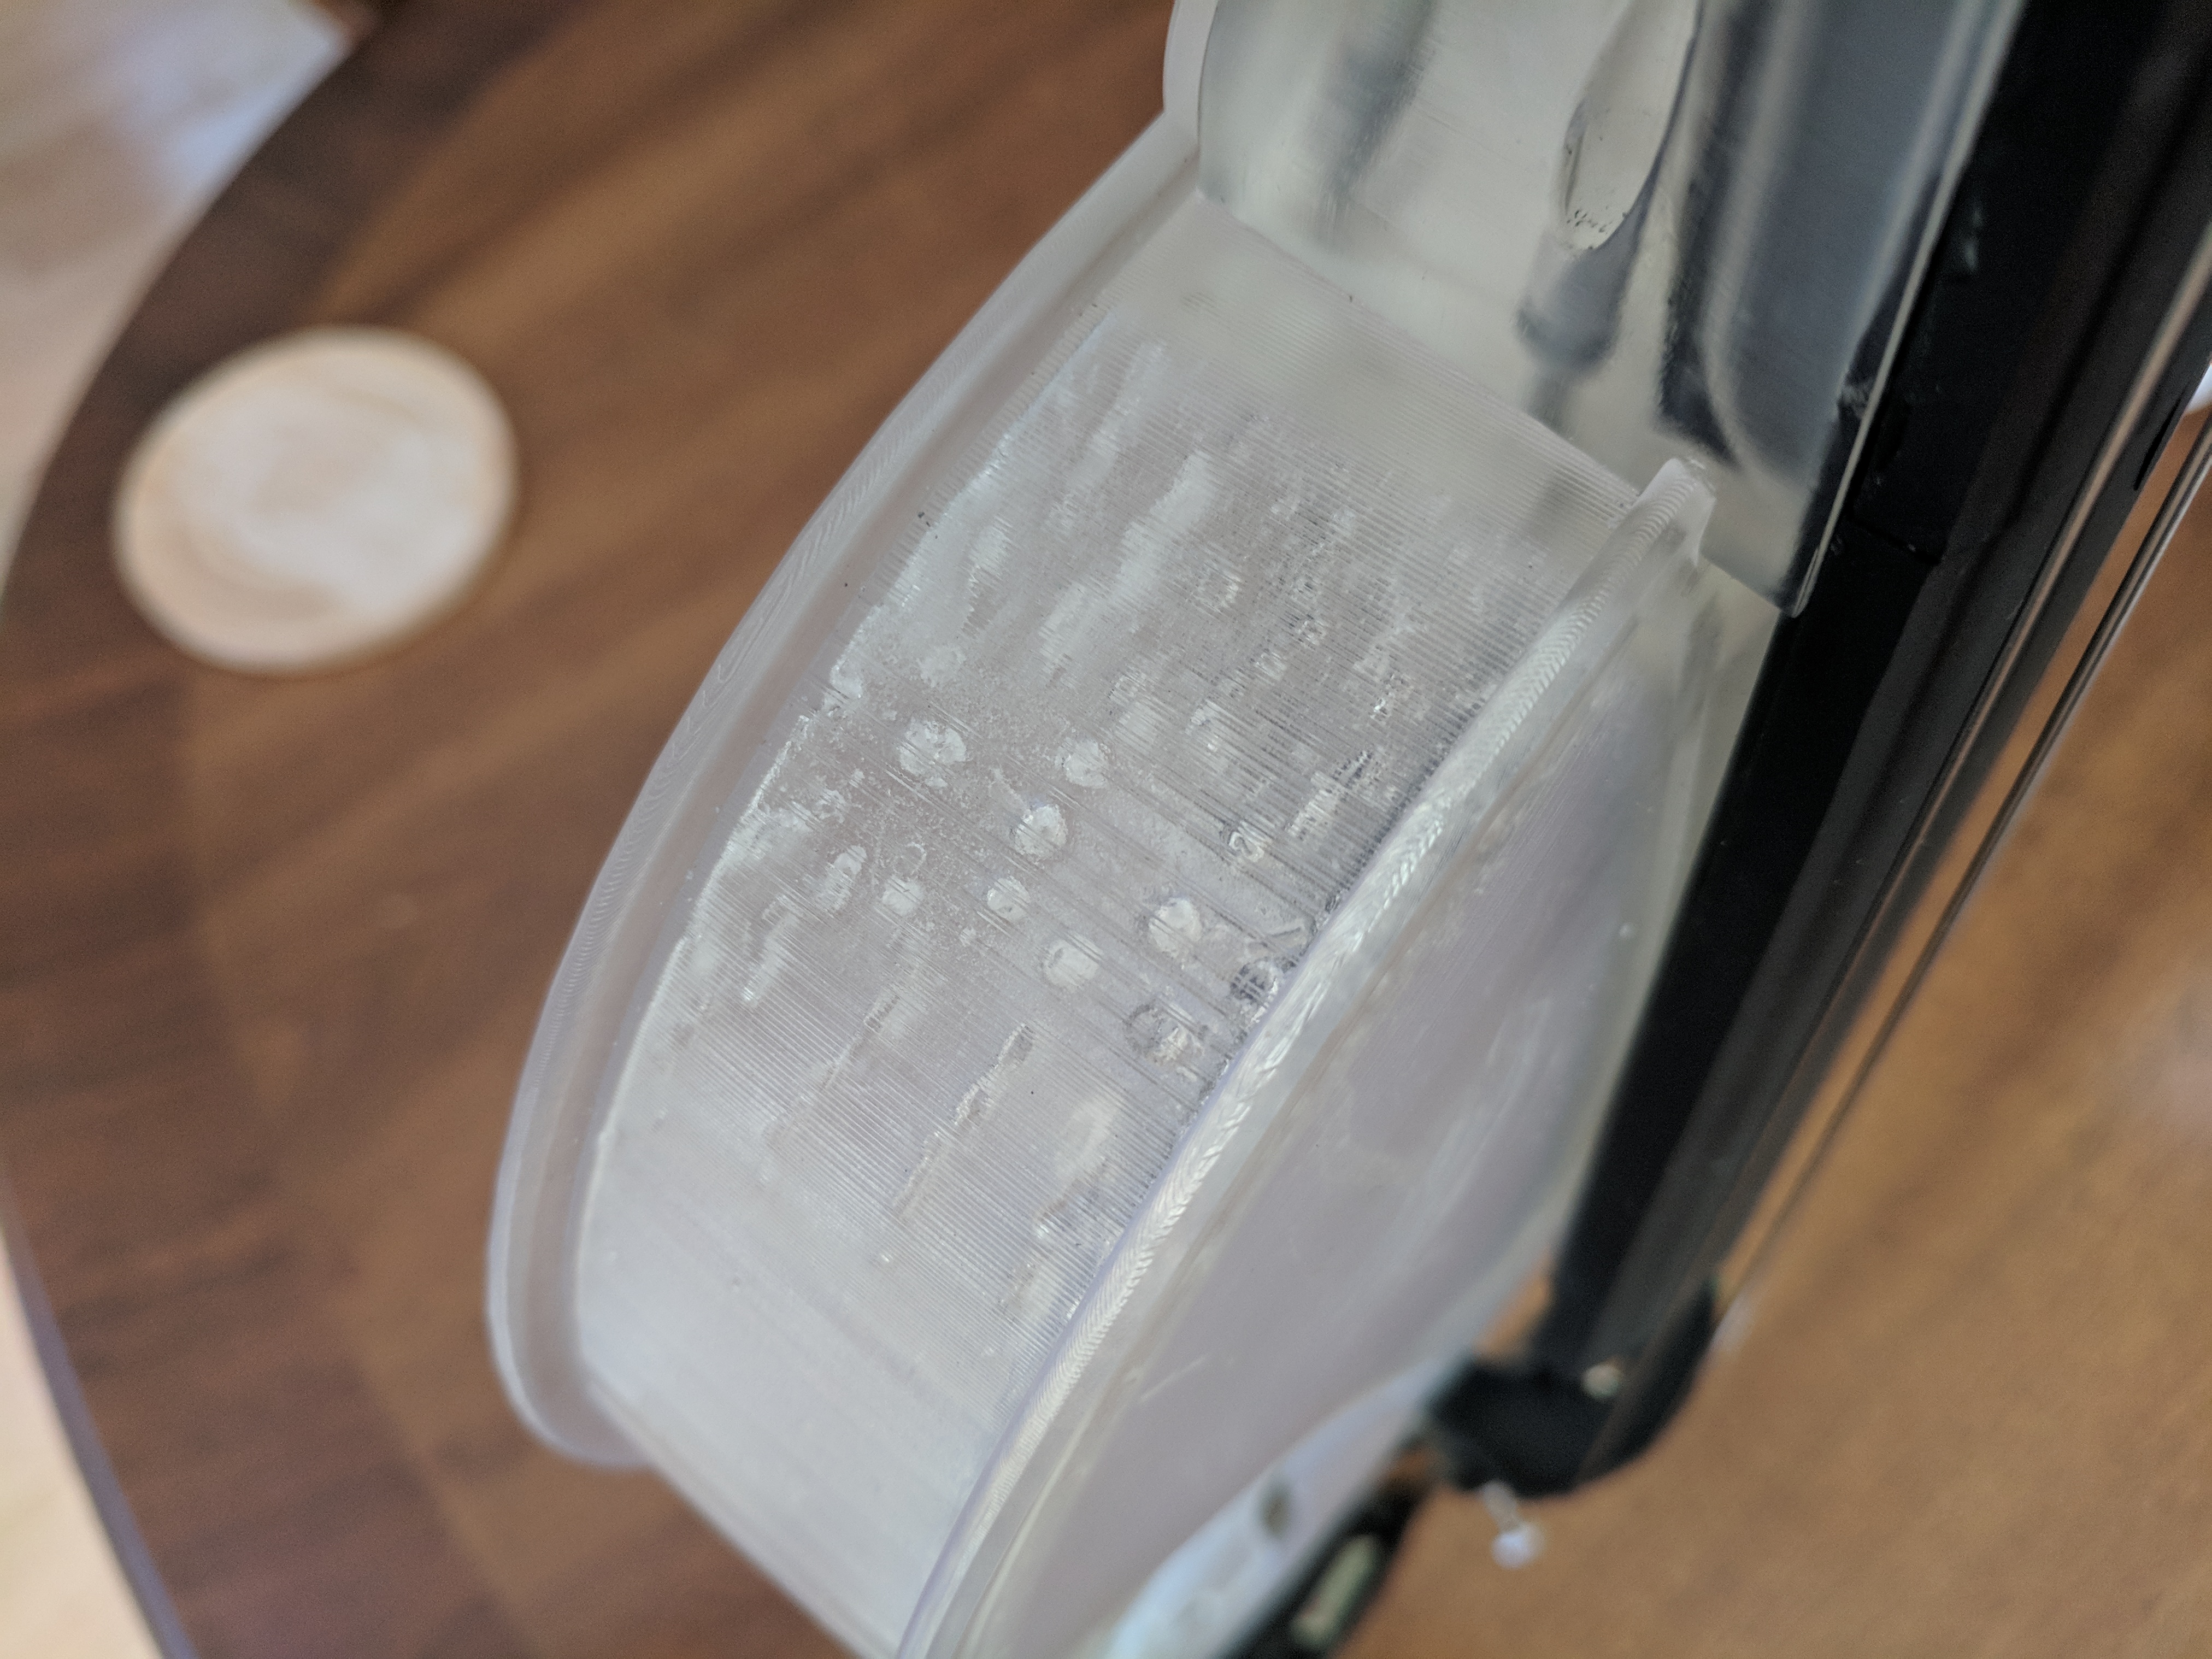
I also scratched up the inside of the body when removing the support
Other than what are arguable workmanship errors, I think the clear resin makes some very pretty prints.
For the most part everything worked and I was able to assemble the 2.0 violin
I was able to string up the violin, but I could only ever actually play the A string.
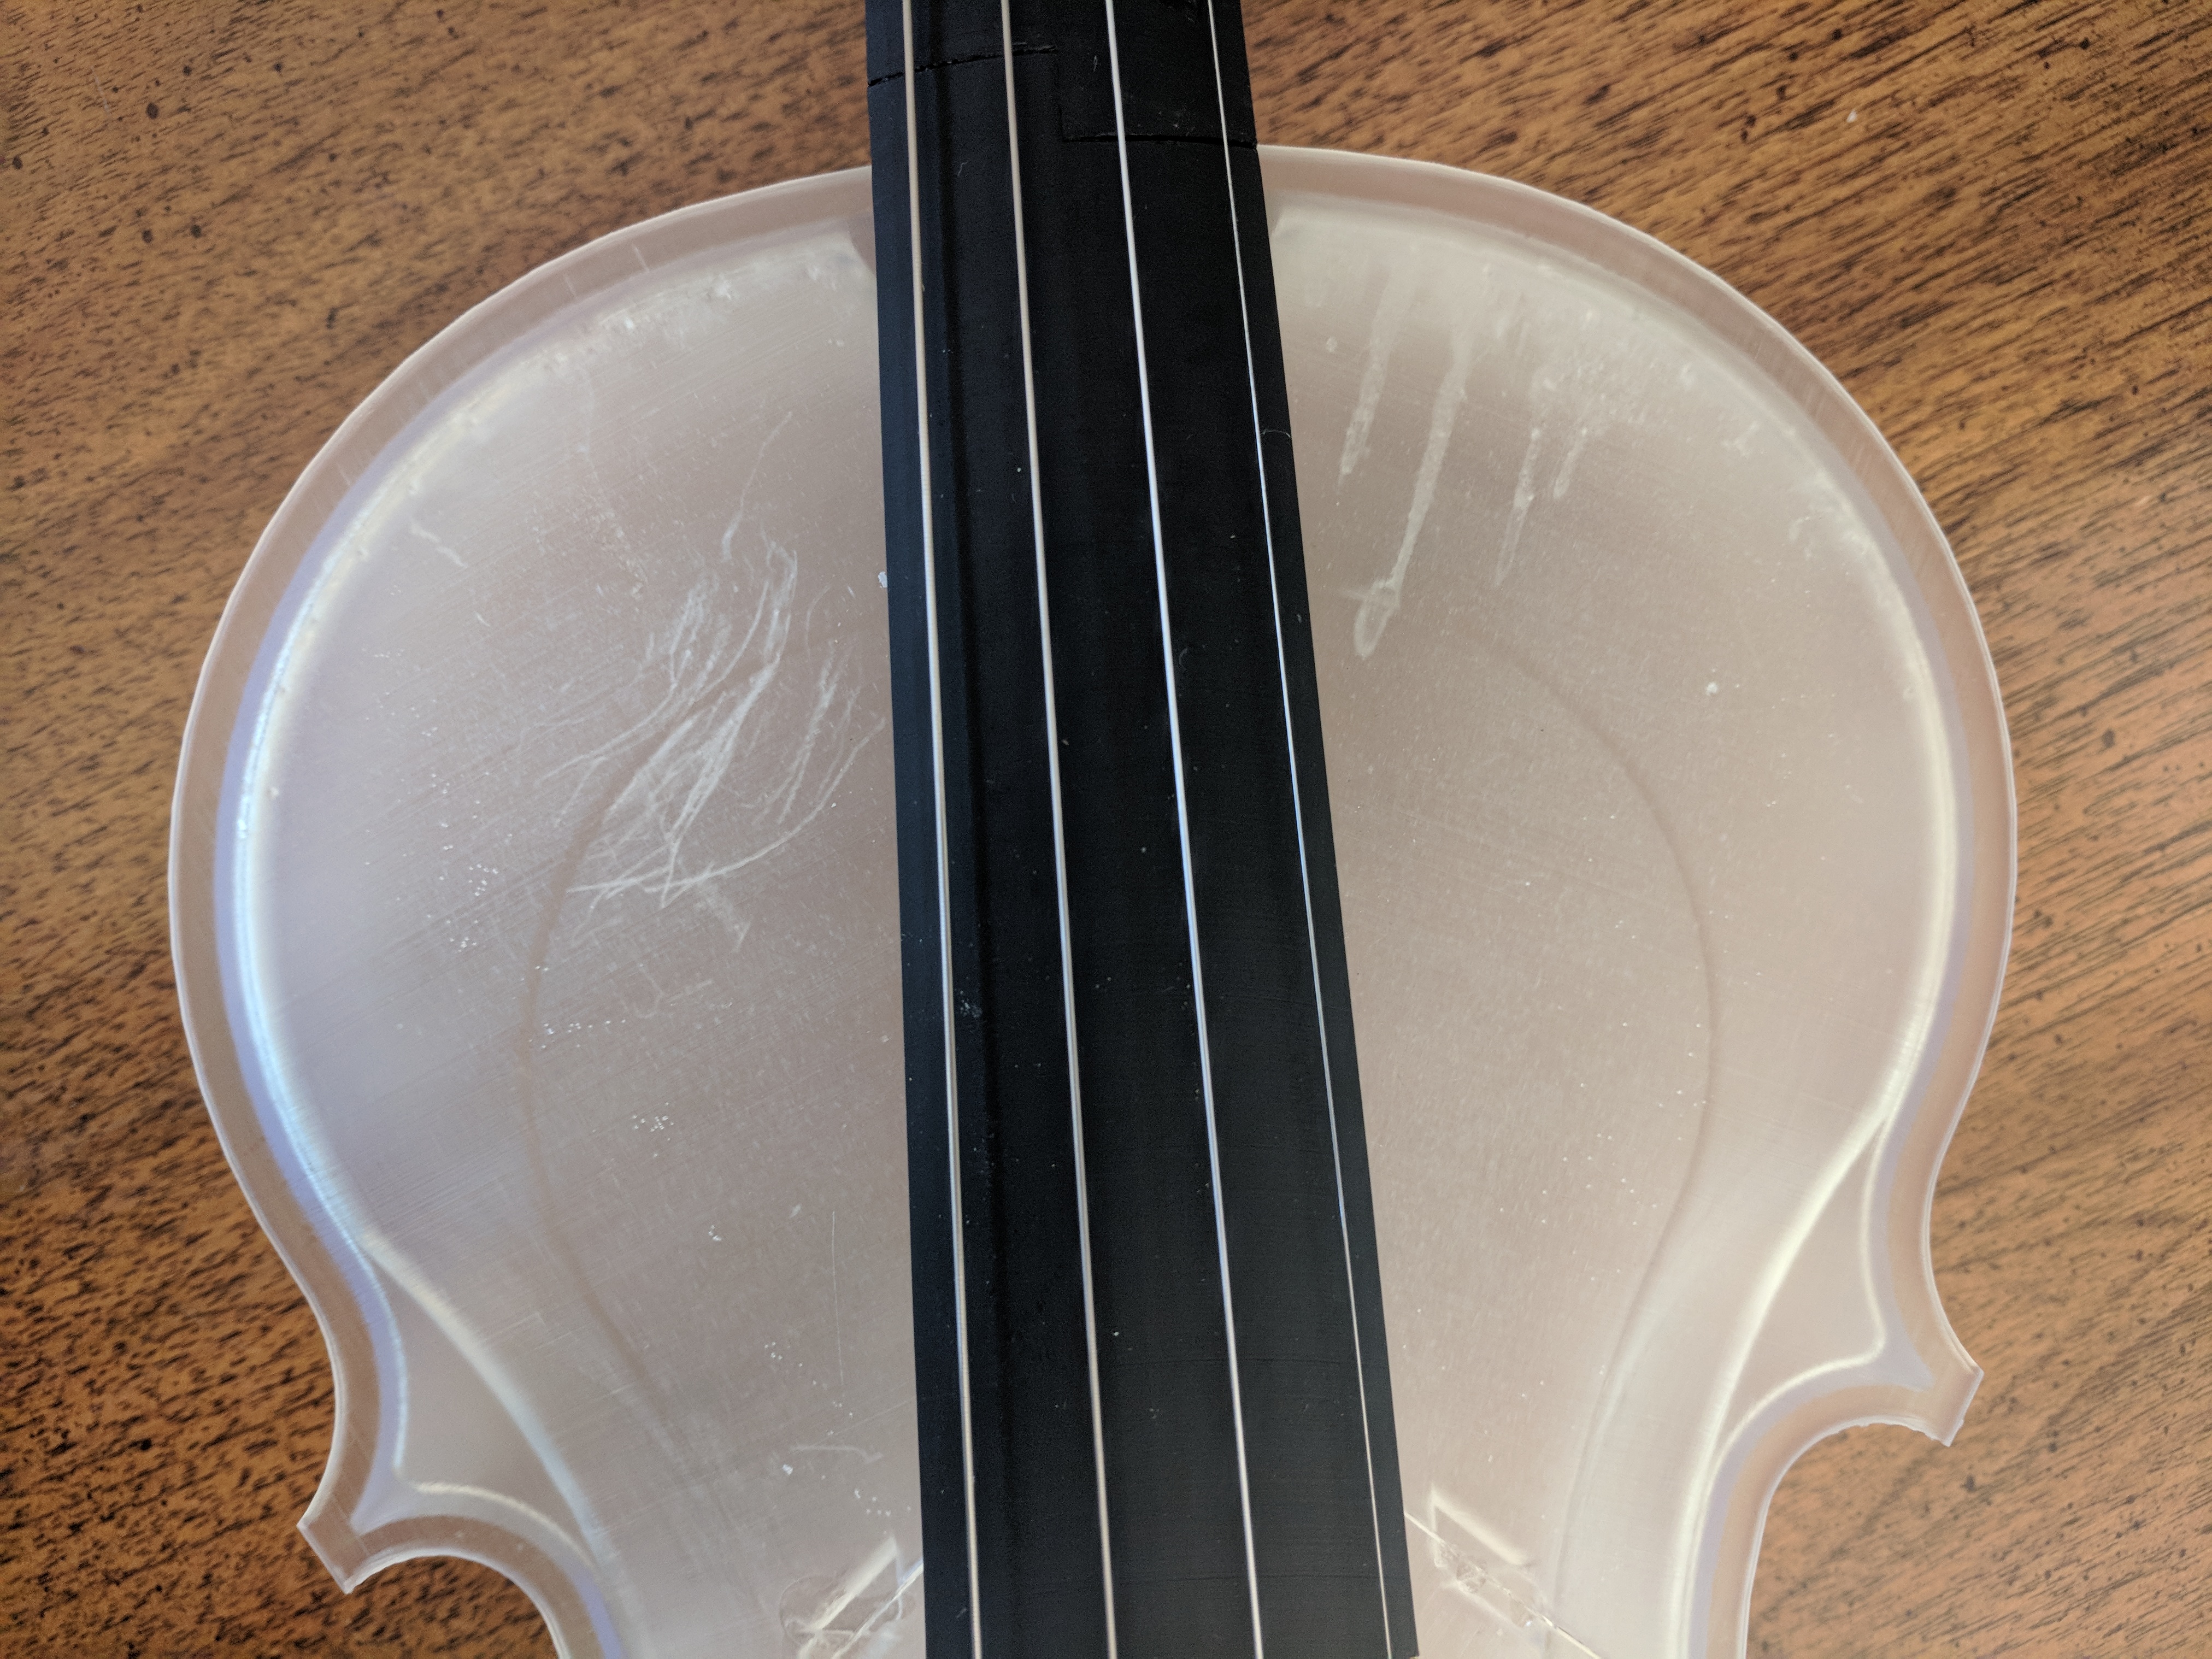
Fingerboard
There are two carbon fiber rods under the fingerboard, and the space for these is very tight. When attaching the fingerboard to the neck I couldn’t get the fingerboard to come down flush. As a result the bottom of the fingerboard touches the E string.
Pegs
The pegs use small copper rod inserts to increase the strength. However it doesn’t provide that much torsional strength and the pegs are long. The peg for the D string broke several times and I couldn’t get the G peg tight enough.
Tailpiece
The tailpiece in the image is actually a store-bought part, not the tailpiece I printed. The tailpeice accepts a fastener which loops around the end pin, but the STL file for the tailpiece doesn’t have holes large enough for the recommended fastener. The chinrest is also store-bought, but that’s because the suggested nuts and bolts are expensive (several dollars each) and I could only find them in packs of 50 or 100.
Version 2.1
With these observations I set out to make some modifications. The folks over at Formlabs made the original CAD files available so I could modify as I saw fit. I don’t have any expereience with other CAD software but I didn’t find OnShape to be the best expereience. Then again it’s web-based nature means I don’t need to have a license for something else. My modifications are availabe on OnShape and are as follows:
- I shortened the pegs by 10mm. With a shorter peg they are much more structurally sound. I haven’t had one break on me yet.
- I added a tiny bit of extra clearance for the carbon fiber rods under the fingerboard. The spacing there is much more friendly now.
- I enlarged the holes for the fastener in the tailpiece. So far the holes still aren’t big enough and I will probably increase the total space underneath the tailpiece.
The modular nature of the violin means I could remove the neck and fingerboard and only rebuild those parts. Given my experience cleaning up support material I was very careful about where I printed supports. This led to a total failure of the top part of the fingerboard to print (not enough support) as well as a partial failure of the lower part of the fingerboard. I didn’t notice that the lower portiton of the fingerboard was slightly bowed until I tried installing it. So I broke it off because I really wanted to play this iteration.
Video of my wife playing version 2.1
Next Steps
There’s more work to do. Before I finished 2.1, I had plans for a 3.0 “final” version which would use a freshly printed body with carefully designed support material and probably printing in white instead of clear. I still need to fix the tailpiec, and maybe see if I can switch to a printed chinrest. Keep an eye out here for further updates!